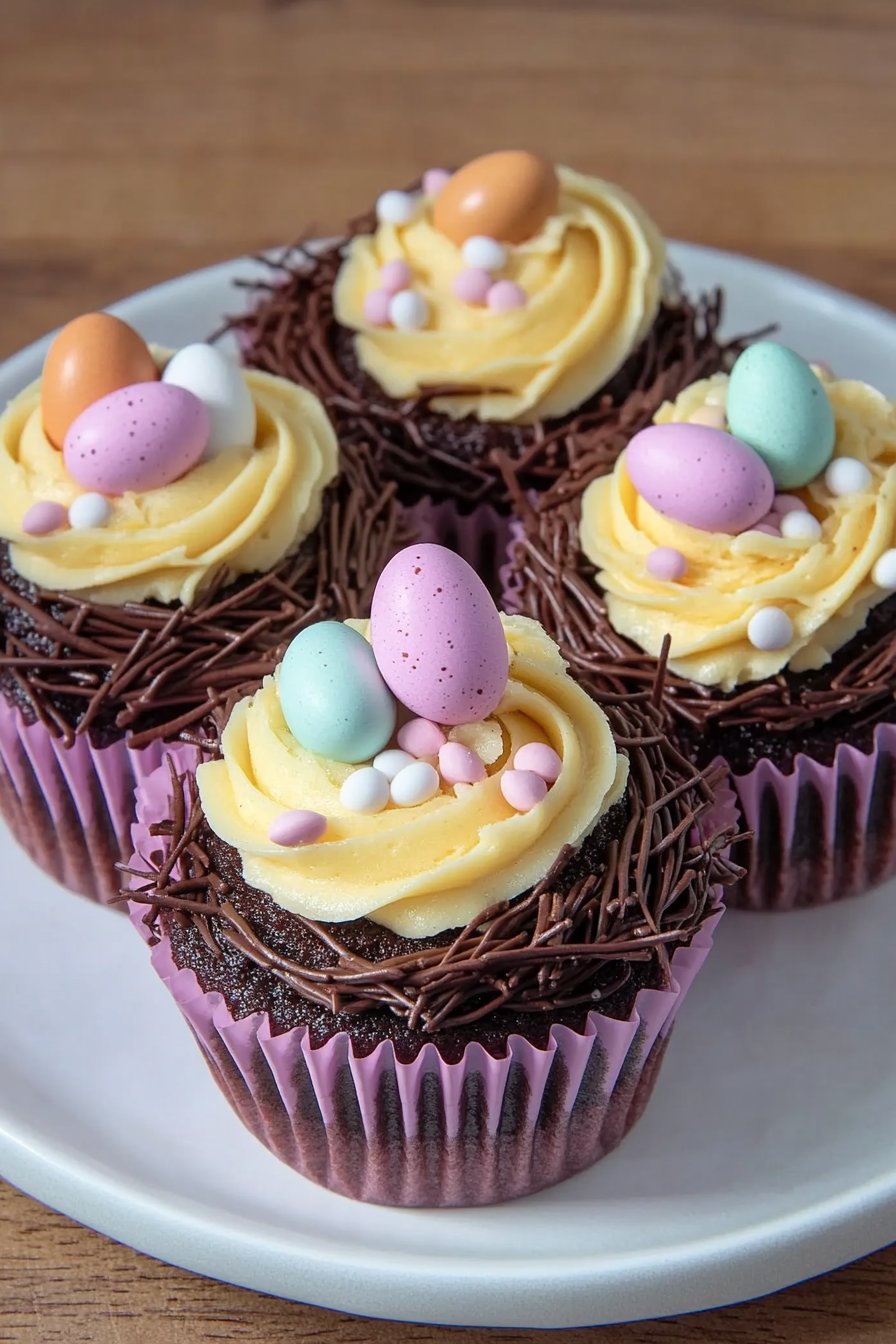
Easter Egg Nest Cupcakes: A Fun Twist on Spring Baking
Hey there! So, Easter is around the corner, and if you’re like me, you probably have a soft spot for all things sweet and festive. I remember the first time I tried making these Easter Egg Nest Cupcakes. It was a complete disaster, mainly because I got too excited and forgot to add sugar (yes, that happened). But boy, have I nailed it now!
Why You’ll Love This
I usually whip up these cupcakes when I want to get into the Easter spirit without, you know, having to deal with actual eggs. My family goes crazy for these because they’re not just cupcakes; they’re little nests filled with chocolate eggs—who wouldn’t love that? Plus, it’s a fun way to get the kids involved (just prepare for some mess, they love to be ‘helpful’).
Ingredients
- 1 cup (225g) unsalted butter, softened (I sometimes cheat and use margarine—no one’s the wiser!)
- 1 cup (200g) sugar
- 4 eggs
- 2 cups (250g) all-purpose flour (my grandma swears by self-raising, but honestly, both work fine)
- 1 tsp baking powder
- 1/2 cup (120ml) milk
- 1 tsp vanilla extract
- 2 cups (about 500g) shredded coconut
- Mini chocolate eggs for decoration (or jelly beans if you’re feeling wild!)

Directions
- Preheat your oven to 350°F (180°C). Line a cupcake tin with paper liners.
- Cream the butter and sugar until light and fluffy. I usually sneak a taste here—quality control, you know?
- Add the eggs one at a time, mixing well after each. Don’t worry if it looks a bit weird at this stage—it always does!
- Mix in the vanilla. Actually, I find it works better if you add it now rather than earlier.
- In a separate bowl, whisk together flour and baking powder. Gradually add to the wet ingredients, alternating with milk. (Expect a bit of arm workout here!)
- Divide the batter among the cupcake liners, filling each about two-thirds full. Bake for 18-20 minutes, or until a toothpick comes out clean.
- While the cupcakes cool, toast the coconut in a dry skillet over medium heat until golden. Stir frequently (trust me, it burns fast!).
- Frost the cupcakes (I sometimes just use store-bought frosting when I’m lazy) and press the toasted coconut on top to resemble a nest.
- Top each cupcake with a few mini chocolate eggs. And voilà!
Notes
Oh, a quick note: if your batter seems too thick, just add a splash of milk. Conversely, if it’s too runny, toss in a bit more flour. It’s all about balance.

Variations
I’ve tried adding a bit of lemon zest to the batter once, thinking it would be refreshing—turns out, it clashed somewhat with the chocolate eggs. But adding some cocoa powder for a chocolate version? Now, that’s a winner!
Equipment
If you don’t have a cupcake tin, you can use those silicone molds—they work like magic. A hand mixer works fine if you don’t have a stand mixer; just expect a bit of a workout!

Storage Information
Store these in an airtight container for up to three days—if they last that long! Honestly, in my house, they never make it past the day.
Serving Suggestions
I love serving these with a big glass of milk or some hot cocoa. We usually have them after our Easter egg hunt—it’s become quite the tradition!
Pro Tips
One time, I tried to rush the toasting of the coconut, and oh boy, it turned into little nuggets of charcoal. So, take your time with it. Slow and steady wins the race, right?
FAQ
Can I use desiccated coconut instead of shredded? Yes, you can! But I think shredded gives it a nicer texture.
What if I don’t like coconut? No worries! Just leave it out, and use colored sprinkles to simulate grass instead.
Can these be made gluten-free? Sure thing! Just substitute the flour with a good gluten-free blend you trust.