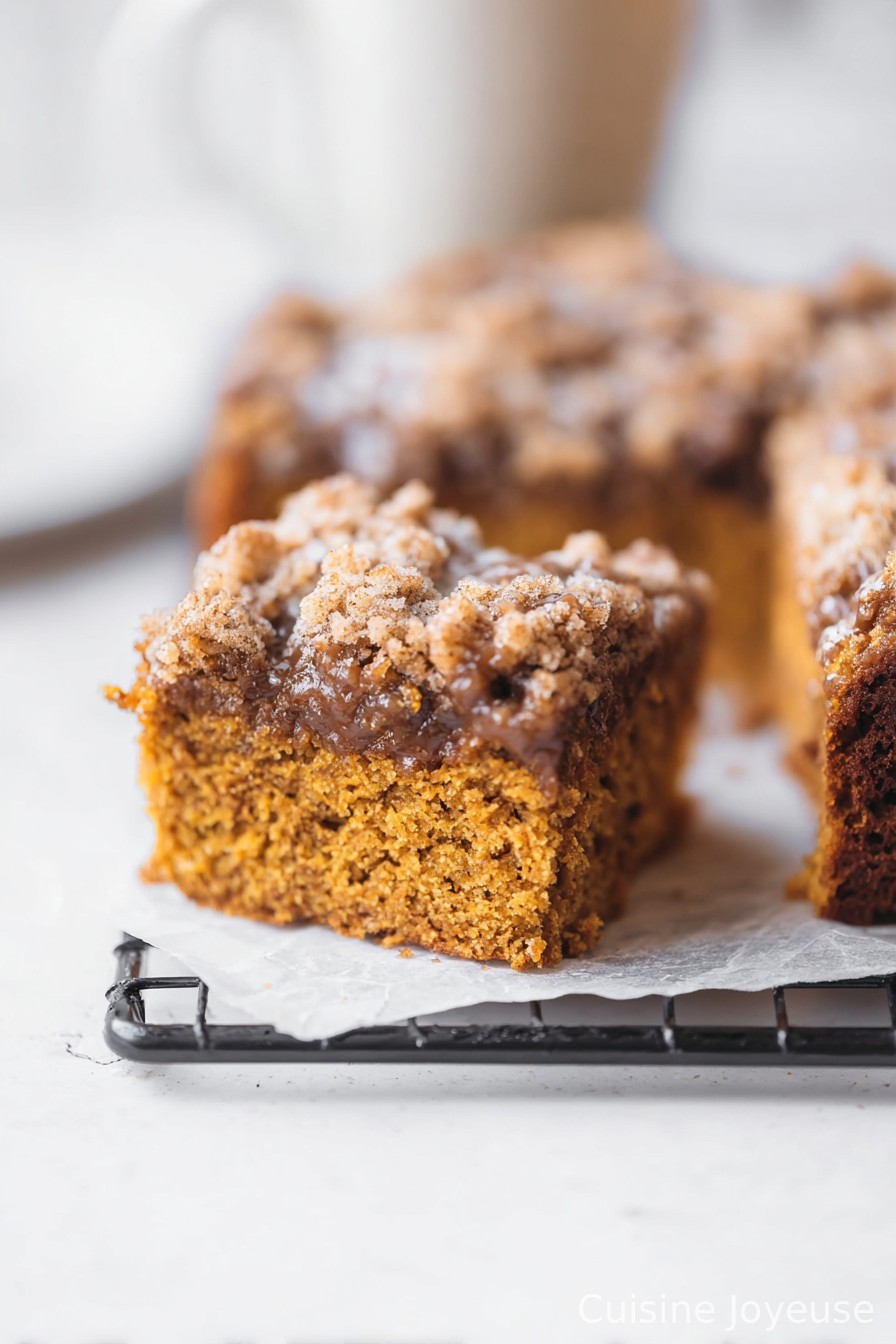
Pumpkin Coffee Cake
Pumpkin Coffee Cake: The Cozy Treat I Make Too Often
Alright, let’s get this out there—I bake this pumpkin coffee cake way more often than I should. It started as a spur of the moment, “what can I do with this leftover canned pumpkin?” situation and, well, now it’s practically a fall tradition. The first time I made it was one of those chilly mornings where you can’t decide if you need a third cup of coffee or just an excuse to turn on the oven. And honestly, the best part is catching that crazy-good blend of spices hanging in the air; one of the first times I brought this to my neighbor’s place for brunch, someone compared the smell to “a fresh pumpkin patch with a touch of magic.” Not sure I’ve topped that yet.
Why You’ll Love This (Even If You’re Not a Huge Pumpkin Fan)
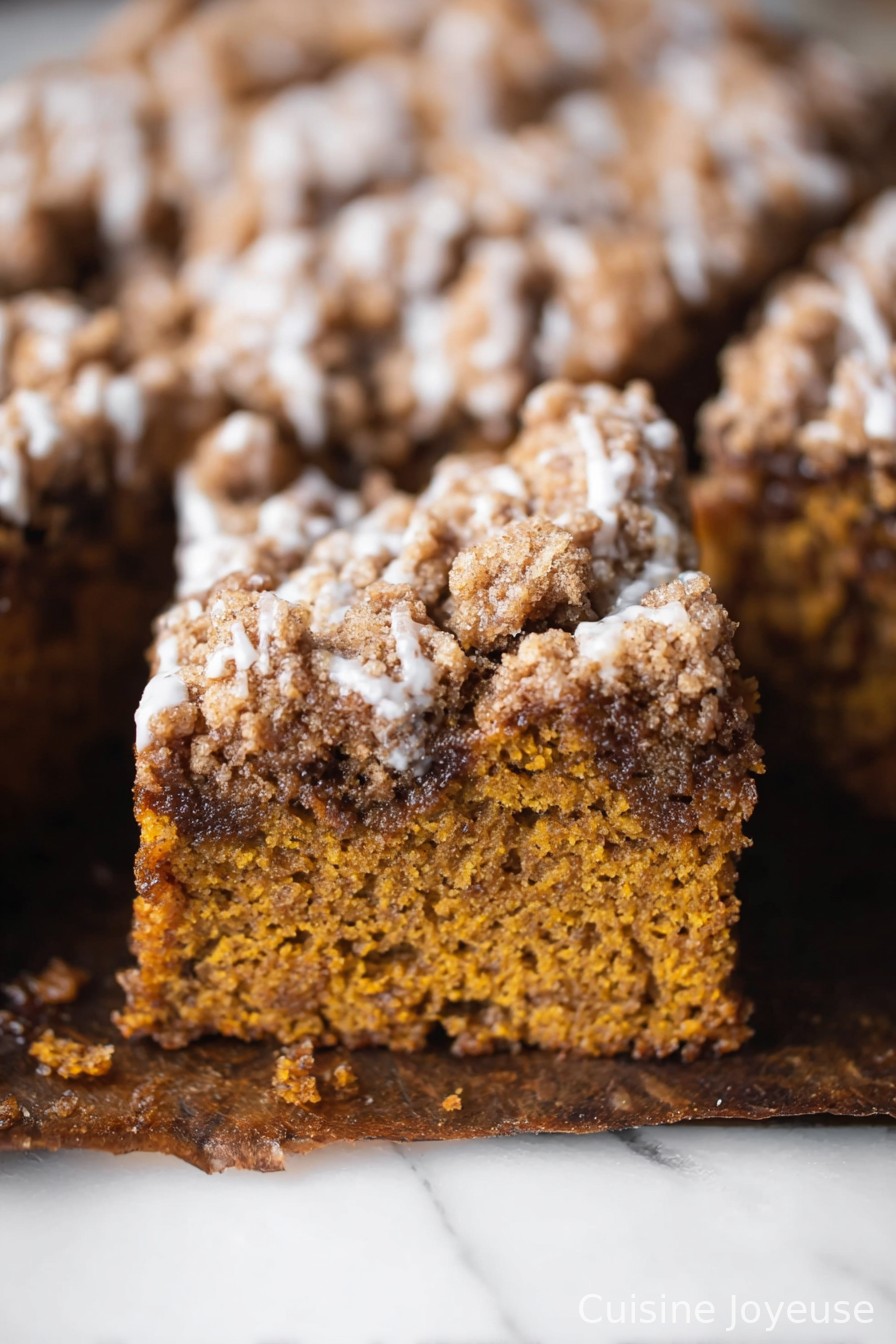
I make this pumpkin coffee cake when I want something to dunk in my mug, and my family goes absolutely wild for it because it has this super-soft crumb and a streusel topping that makes it taste kind of fancy, even if I forgot to buy fresh nutmeg again. My brother actually requests it instead of birthday cake—true story! Oh, and I’ll admit, there were times the streusel turned into more of a cinnamon-sugar “boulder” (don’t overthink the butter, folks). But the cake still gets devoured, no matter what shape it’s in.
You’ll Need These Ingredients:
- 1 and 3/4 cups all-purpose flour (or, if you’re feeling adventurous, 1 cup all-purpose + 3/4 cup whole wheat flour—I do this when I’m pretending to eat healthy)
- 1 cup granulated sugar (my grandmother always used brown sugar for a darker, richer cake—it’s good both ways honestly)
- 1 tsp baking powder
- 1/2 tsp baking soda
- 1/2 tsp salt
- 1 & 1/2 tsp ground cinnamon
- 1/2 tsp ground ginger
- 1/4 tsp ground nutmeg (or pumpkin pie spice if you’re in a hurry—no one’s judging)
- 1/4 tsp ground cloves
- 1 cup pumpkin puree (not pumpkin pie filling! Learned this the hard way.)
- 1/2 cup melted butter (I sometimes use coconut oil when I run out—different but still delicious)
- 2 large eggs
- 1/4 cup sour cream (Greek yogurt does the trick in a pinch)
- 2 tsp vanilla extract
For the Streusel Topping:
- 1/2 cup packed brown sugar
- 1/3 cup all-purpose flour
- 1/4 cup cold butter, cubed
- 1 tsp cinnamon (or a wild mix of whatever spices you’re feeling that day—I threw some allspice in once, no regrets)
- A handful of chopped pecans or walnuts (totally optional but adds great crunch—I skip this when making it for my nut-averse cousin)
How to Make It (Or: Where Things Sometimes Get Messy)
- Start by preheating your oven to 350°F (175°C). I once forgot this and wondered why the cake never baked—don’t be me. Grease or line an 8-inch square pan. Doesn’t have to be perfect.
- Mix up the streusel first: In a small bowl, combine the brown sugar, flour, cinnamon, and cold butter. Mash together using a fork (or, I honestly just use my fingers because it’s faster). Stir in nuts if you want ’em. Pop the bowl in the fridge while you do the cake batter.
- In a big mixing bowl, toss in the flour, sugar, baking powder, baking soda, salt, cinnamon, ginger, nutmeg, and cloves. Give it a quick stir—don’t overthink it.
- In another bowl, whisk together the pumpkin puree, melted butter, eggs, sour cream, and vanilla. If there’s a bit of unmixed egg white stubbornly floating around, it’s fine. Welcome to the club.
- Pour the wet mix into the dry stuff. Gently combine everything with a spatula (I usually end up with flour on my shirt at this stage, but hey, that’s part of the charm). Try not to over-mix—it’s okay to see a few streaks.
- Spoon the batter into your prepared pan and spread it out. Might need a little coaxing—it’s thick.
- Take the streusel out of the fridge and scatter it all over the top. Don’t worry if it isn’t perfectly even or if you dropped a big buttery clump somewhere—trust me, it’ll bake up great.
- Pop the pan in the oven for 32 to 38 minutes, or until a toothpick stuck in the center comes out without goop (crumbs are good, goop is not—it’s a scientific method). The top will look golden and a little crackly.
- Let it cool in the pan at least 15 minutes before slicing. This is where I usually sneak a tiny corner to “check doneness.”

Notes (The Bits No One Tells You)
- The flavor gets richer if you cover the cake and let it sit overnight, but honestly… it never lasts that long in our house.
- If you use salted butter, just skip adding the extra salt. Or don’t—maybe you like that salty-sweet vibe. I won’t stop you; live your life.
- You don’t have to use a stand mixer for this. I actually prefer a bowl and spatula—it’s less washing up (and I’m lazy that way).
Variations (Some Great, Some… Not So Much)
- Swapped in applesauce for half the pumpkin once—unexpectedly lovely!
- Added a cream cheese swirl. Looked fancier than it tasted, honestly—maybe my cream cheese skills aren’t legendary.
- Threw in chocolate chips one time and immediately regretted it. Overpowered everything. Maybe someone else will nail it, but I’m not trying again.
- Skip nuts, add dried cranberries if you want a little tart zing.
Equipment (Or: What If I Don’t Have That…)
- 8-inch square baking pan (I used a round cake pan one time—worked fine, just had to watch the baking time)
- Mixing bowls
- Spatula or big spoon (no fancy gadgets required, though my friend swears by her electric mixer for this—I can’t tell the difference)
- Fork or your own two hands for the streusel
How to Store It (Or… Will You Even Have Leftovers?)
Technically, you can cover this tightly and keep it at room temp for two days (fridge if longer), but, honestly, it rarely makes it past breakfast the next day around here. And yes, I think it tastes even better the day after baking, once the flavors have mingled a bit.
Serving Suggestions That Make It Even More Comforting
Personally, I think this cake pairs best with a giant mug of coffee or tea (my aunt dunks hers in hot cocoa, which sounds decadent to me). Sometimes, if I’m feeling “extra”, I’ll add a dollop of whipped cream or—don’t tell anyone—a scoop of vanilla ice cream for dessert. Warm it up for a few seconds in the microwave if you’re living your best life.
Pro Tips (Learned the Hard Way)
- Don’t rush the cooling part. I cut it early once and wow, did it smear everywhere. Tempting, but patience is a virtue here.
- Actually, I find it works better if you use room temperature eggs—makes it less clumpy, though in a pinch, fridge-fresh ones work too.
- If your streusel seems dry, add just a touch more butter. If it’s a greasy mess… add a spoonful of flour and pretend that was the plan all along.
FAQ (The Questions I’ve Actually Been Asked, Honest)
- Do I really need to use canned pumpkin, or can I roast my own?
No need to be fancy. Canned works perfectly and saves you a headache, but if you’re in the mood to roast, go for it! Just mash it well so it’s not stringy. - Can I make this gluten-free?
Yep! Just use your favorite 1:1 gluten-free flour blend. I haven’t tried almond flour solo—seems risky—but who knows? - Help! I forgot the sour cream. Is it ruined?
Nope—Greek yogurt or even plain yogurt works fine. Done it myself in a pinch and couldn’t tell the difference. - What if I don’t have cloves or nutmeg?
Substitute with extra cinnamon or pumpkin pie spice. Not quite the same, but it’ll taste warm and cozy anyway. - Can I freeze this?
Sure! Slice and wrap it up, then just thaw at room temp. But, to be honest, I never have enough left to test this for more than a week, so—good luck!
Now, I’d write more, but my timer’s beeping and I think my coffee cake wants some attention (or maybe that’s just my appetite). Happy baking—let me know how yours turns out, even if it’s a little wonky around the edges. Those are always the best bites.
Ingredients
- 1 and 3/4 cups all-purpose flour (or 1 cup all-purpose + 3/4 cup whole wheat flour as a sub)
- 1 cup granulated sugar (or brown sugar for a richer cake)
- 1 tsp baking powder
- 1/2 tsp baking soda
- 1/2 tsp salt
- 1 & 1/2 tsp ground cinnamon
- 1/2 tsp ground ginger
- 1/4 tsp ground nutmeg (or pumpkin pie spice as a sub)
- 1/4 tsp ground cloves
- 1 cup pumpkin puree
- 1/2 cup melted butter (or coconut oil as a sub)
- 2 large eggs
- 1/4 cup sour cream (Greek yogurt as a sub)
- 2 tsp vanilla extract
- 1/2 cup packed brown sugar (for streusel)
- 1/3 cup all-purpose flour (for streusel)
- 1/4 cup cold butter, cubed (for streusel)
- 1 tsp cinnamon (for streusel)
- A handful of chopped pecans or walnuts (optional, for streusel)
Instructions
-
1Start by preheating your oven to 350°F (175°C). I once forgot this and wondered why the cake never baked—don’t be me. Grease or line an 8-inch square pan. Doesn’t have to be perfect.
-
2Mix up the streusel first: In a small bowl, combine the brown sugar, flour, cinnamon, and cold butter. Mash together using a fork (or, I honestly just use my fingers because it’s faster). Stir in nuts if you want ’em. Pop the bowl in the fridge while you do the cake batter.
-
3In a big mixing bowl, toss in the flour, sugar, baking powder, baking soda, salt, cinnamon, ginger, nutmeg, and cloves. Give it a quick stir—don’t overthink it.
-
4In another bowl, whisk together the pumpkin puree, melted butter, eggs, sour cream, and vanilla. If there’s a bit of unmixed egg white stubbornly floating around, it’s fine. Welcome to the club.
-
5Pour the wet mix into the dry stuff. Gently combine everything with a spatula (I usually end up with flour on my shirt at this stage, but hey, that’s part of the charm). Try not to over-mix—it’s okay to see a few streaks.
-
6Spoon the batter into your prepared pan and spread it out. Might need a little coaxing—it’s thick.
-
7Take the streusel out of the fridge and scatter it all over the top. Don’t worry if it isn’t perfectly even or if you dropped a big buttery clump somewhere—trust me, it’ll bake up great.
-
8Pop the pan in the oven for 32 to 38 minutes, or until a toothpick stuck in the center comes out without goop (crumbs are good, goop is not—it’s a scientific method). The top will look golden and a little crackly.
-
9Let it cool in the pan at least 15 minutes before slicing. This is where I usually sneak a tiny corner to “check doneness.”
Approximate Information for One Serving
Nutrition Disclaimers
Number of total servings shown is approximate. Actual number of servings will depend on your preferred portion sizes.
Nutritional values shown are general guidelines and reflect information for 1 serving using the ingredients listed, not including any optional ingredients. Actual macros may vary slightly depending on specific brands and types of ingredients used.
To determine the weight of one serving, prepare the recipe as instructed. Weigh the finished recipe, then divide the weight of the finished recipe (not including the weight of the container the food is in) by the desired number of servings. Result will be the weight of one serving.
Did you make this recipe?
Please consider Pinning it!